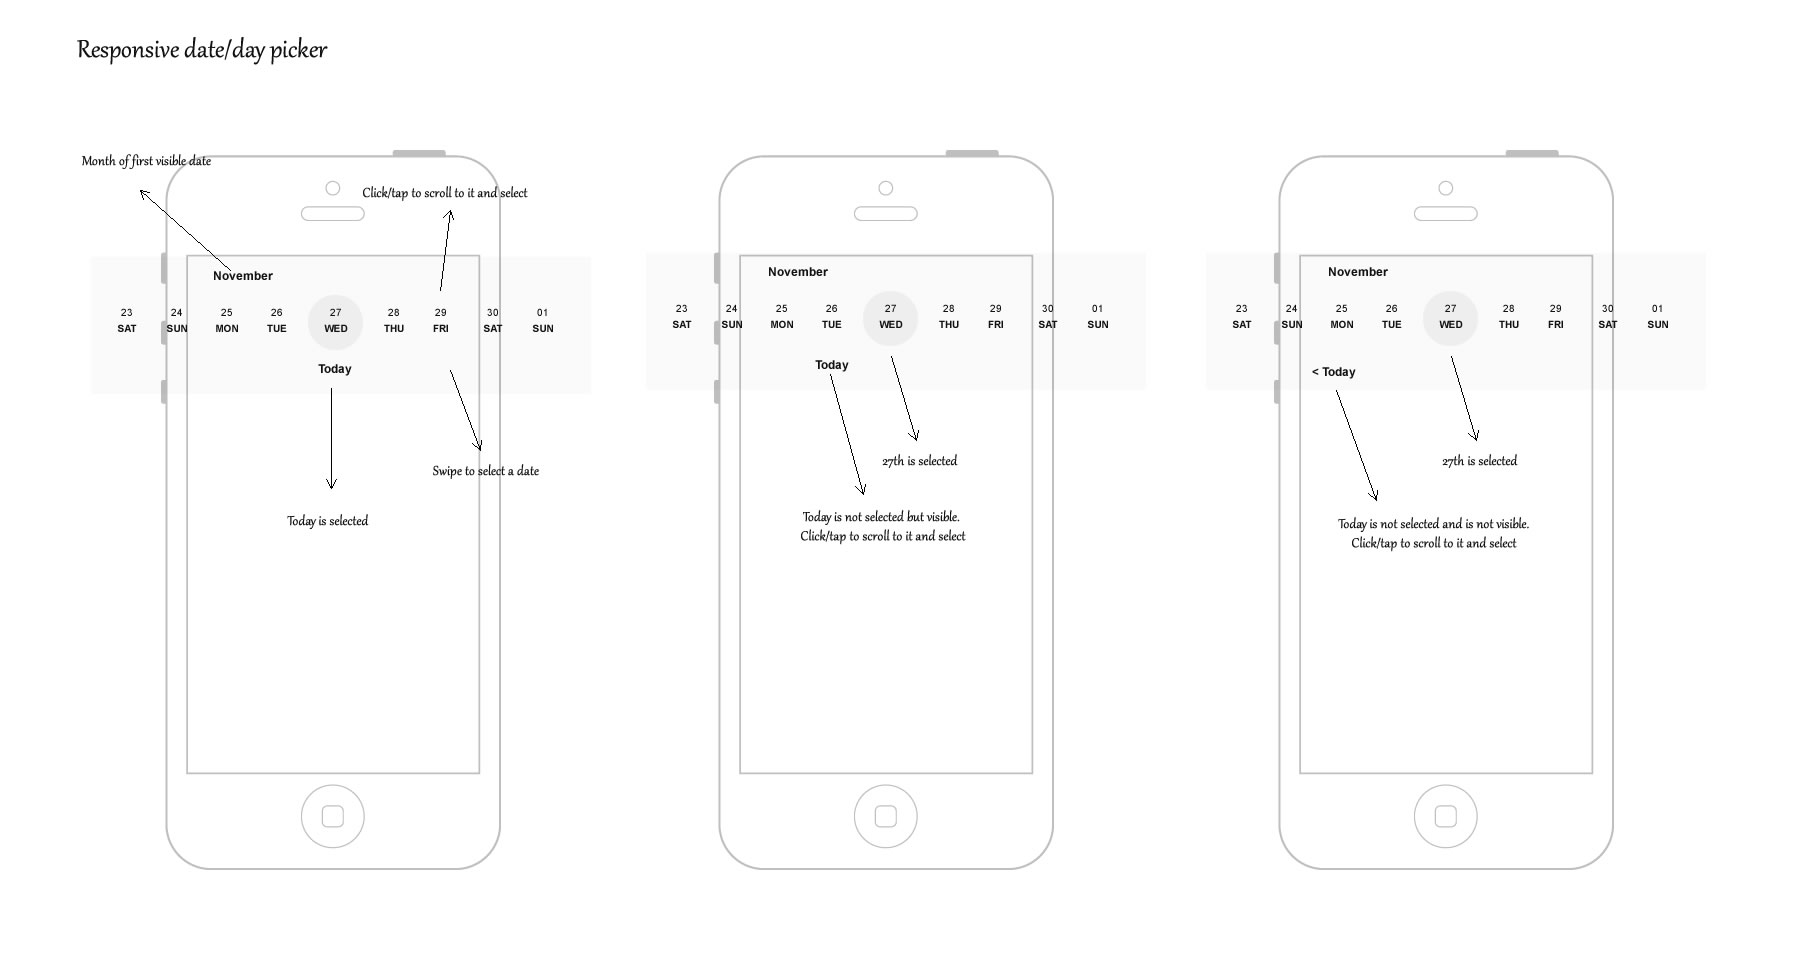
For a project I am working on I need to create a datepicker (mockup) for touch devices. In this post we will be focusing on infinite scrolling since that's the most interesting problem to solve. We'll also make it vertical instead of horizontal which simplifies the css a little (no floats or flexbox).
If you just want to see the demo, skip to the bottom of the page.
The setup
We'll be using the following sizes:
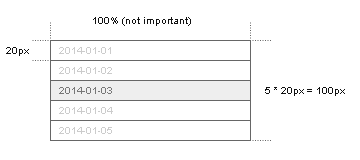
If we translate this to html and css, it looks something like this:
<div class='datepicker'>
  <div class='days' style='height: 100px; overflow: hidden;'>
    <div class='wrapper'>
      <div class='day' style='height: 20px;'>2014-01-01</div>
      <div class='day' style='height: 20px;'>2014-01-02</div>
      <div class='day selected' style='height: 20px;'>2014-01-03</div>
      <div class='day' style='height: 20px;'>2014-01-04</div>
      <div class='day' style='height: 20px;'>2014-01-05</div>
    </div>
  </div>
</div>
So we have 5 rows and select the middle row. In React.js that means we need to set 2 state properties: the current date and a list of dates.
var Datepicker = React.createClass({
  getInitialState: function () {
    var today = dates.new();
    return {
      current: today,
      days: dates.middleRange(today, 5)
    };
  },
});
I am using a few helper methods I created for moment.js in this example. You can find the code over here.
In this case when our component starts, it will create a range of 5 dates with the today date as the third item.
Lets define our render method next and hook up some events and handlers.
/* LOGIC */
scrollTo: function (date) {
},

/* RENDER */
render: function () {

  var self = this;

  var days = this.state.days.map(function (day) {

    var clss = 'day';

    if (day.isSame(self.state.current)) {
      clss += ' selected';
    }

    return (
      <div className={clss} onClick={self.scrollTo.bind(null, day)}>
        {day.format('YYYY-MM-DD')}
      </div>
    );
  });

  return (
    <div className='date-picker'>
      <div ref='days' className='days'>
        <div ref='wrapper' className='wrapper'>
          {days}
        </div>
      </div>
    </div>
  );
},
First we create our events from this.state.days and if one of the days matches this.state.current we add a .selected class. We also add an onClick handler on the rows that will bind our scrollTo method with that day's date.
Scroll to infinity and beyond
Now that we have our component setup we can start by adding infinite scrolling. Since it depends if the date we are scrolling to is after or before the current date we need to check that first.
up: function (date) {},
down: function (date) {},

scrollTo: function (date) {

  if (date.isAfter(this.state.current)) {
    this.down(date);
  }

  if (date.isBefore(this.state.current)) {
    this.up(date);
  }
},
I decided to put up and down into their own methods. You don't have to do that, but it helps to keep all the methods relatively small which mostly means they are easier to test. Lets implement down first.
Going down
Lets say we have the following scenario:
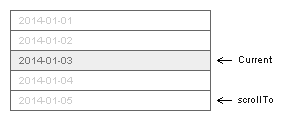
We are currently selecting the 3rd of January and we want to scroll to the 5th. Before we can start scrolling to the 5th we also need to have the rows that contain the 6th and 7th of January in our DOM tree.
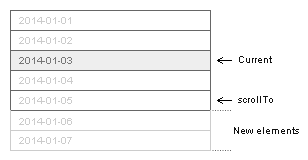
Creating elements with React.js is done by adjusting the state so our down method has to define a new range.
down: function (date) {
  var start = dates.new(this.state.current).subtract('days', 2);
  var end = dates.new(date).add('days', 2);
  var range = dates.range(start, end);

  this.setState({
    days: range,
    current: date,
  });
}
The start date of our new range will be the current date minus 2 days. The end date will be the date we are scrolling to plus 2 days. We then set state.days to our new range and state.current to the date we are scrolling to.
We end up with the following result:
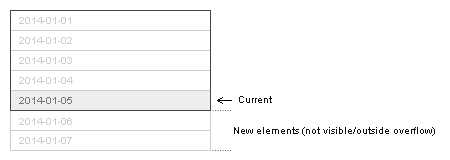
Now that our rows are added and the date we are scrolling to is highlighted, the next step will be to move our div.wrapper 40 pixels up so the new date is in the middle again.
We know our datepicker has a constant of 5 rows, our new range is 7 rows, a row is 20 pixels and we need to move -40 pixels on the y-axis. If all goes well (5 - 7) * 20 should give us -40 back.
Lets add this to our down method:
down: function (date) {
  var start = dates.new(this.state.current).subtract('days', 2);
  var end = dates.new(date).add('days', 2);
  var range = dates.range(start, end);

  this.setState({
    days: range,
    current: date,
  });

  var top = (5 - range.length) * 20;
}
We also need to access the DOM node of our wrapper element:
var wrapper = this.refs.wrapper.getDOMNode();
Now that we have that reference and we know how many pixels we need to move up, we can add our animation.
First step of the animation is to clear the transition and reset the position of our wrapper. If you don't do this you'll get weird bouncy animations from previous scrolls styles on the wrapper element.
wrapper.style.transition = 'none';
wrapper.style.transform = 'translate(0, 0)';
You could also use margins instead of transformations but the latter will use hardware acceleration. This blog post has a lot of information about css transitions.
Next we can add the transition again and set the destination of our wrapper.
setTimeout(function () {
  wrapper.classList.add('transition');
  wrapper.style.transform = 'translate(0, ' + top + 'px)';
}, 0);
You need to do this inside a setTimeout otherwise it's instantaneous and the browser won't pick up on the changes.
Our complete down method should look something like the following:
down: function (date) {
  var start = dates.new(this.state.current).subtract('days', 2);
  var end = dates.new(date).add('days', 2);
  var range = dates.range(start, end);

  this.setState({
    days: range,
    current: date,
  });

  var top = (5 - range.length) * 20;
  var wrapper = this.refs.wrapper.getDOMNode();

  wrapper.style.transition = 'none';
  wrapper.style.transform = 'translate(0, 0)';

  setTimeout(function () {
    wrapper.style.transition = 'all 200ms linear';
    wrapper.style.transform = 'translate(0, ' + top + 'px)';
  }, 0);
},
If you used React.js before you might have noticed that we don't wait for the DOM elements to be created before animating the wrapper. If you want to make sure that the elements are actually created before animating the wrapper you can move the transition and transform code to componentDidUpdate. In this case I don't really expect any problems with race conditions so it's probably fine to just start moving the wrapper right away.
Going up
The up method is almost the same as our down method but in reverse.
up: function (date) {
  var start = dates.new(date).subtract('days', 2);
  var end = dates.new(this.state.current).add('days', 2);
  var range = dates.range(start, end);

  this.setState({
    days: range,
    current: date,
  });

  var top = (5 - range.length) * 20;
  var wrapper = this.refs.wrapper.getDOMNode();

  wrapper.style.transition = 'none';
  wrapper.style.transform = 'translate(0, ' + top + 'px)';

  setTimeout(function () {
    wrapper.style.transition = 'all 200ms linear';
    wrapper.style.transform = 'translate(0, 0)';
  }, 0);
},
There is some duplication between the up and down method so you could extract the code they got in common into their own methods.
The demo
You can find the code here. The demo has extra buttons to show how flexible scrollTo is and an extra animate method to deal with cross browser transitions and transforms.